How to use dependencies in monday.com
In our previous blog, we showcased how to create a Gantt chart in monday.com and how to change the way that chart looks. Gantt charts give you a visualisation of how your projects are coming along.
But what if we want to have strict timings with our tasks? After all, it would be hard to build a shed or house without the bricks being ordered and delivered first.
If you have deadlines or tasks that depend on the completion of other tasks in that project, you need to use dependencies on monday.com. Dependencies allow you to create relationships between items in the same board, making one task depend on another being complete or at a certain stage before the next can begin.
The head item acts as a ‘parent’ task that the ‘child’ task is dependent on, meaning the ‘child’ item will not change automatically until the parent item’s dependency condition has been fulfilled.
After setting up, view your dependencies in flow through your Gannt chart. So let’s show you how!
How to set up dependencies in monday.com
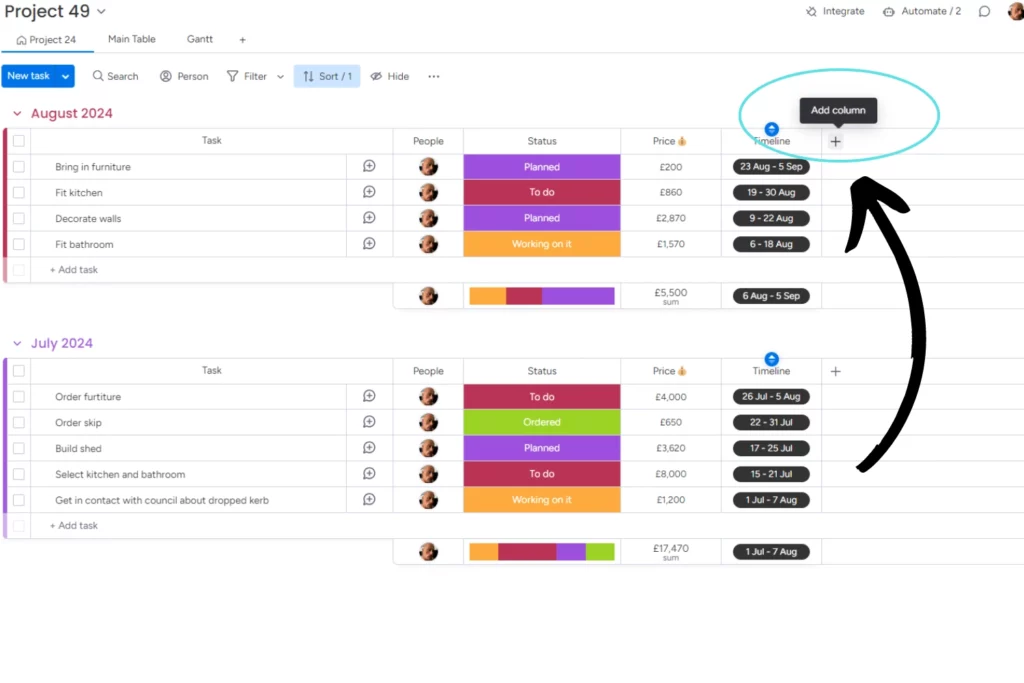
Dependencies are set up within individual boards. First, select which board you would like to set up a dependency on. Once you have your board, navigate to the “+” (add column) symbol at the top of any of your groups of items.
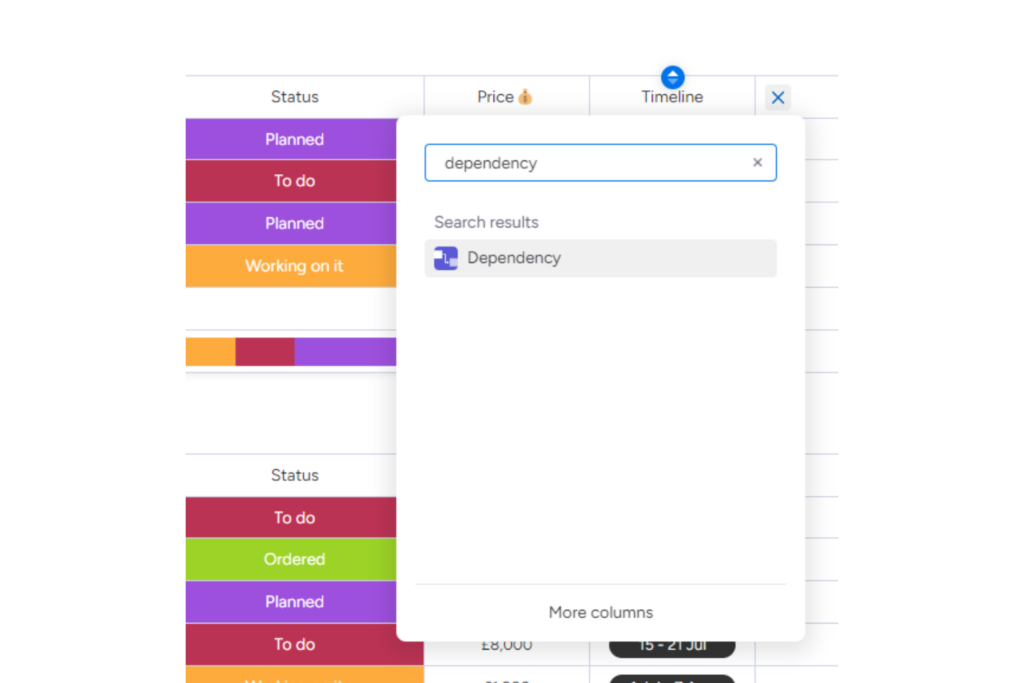
When the search bar comes up, type in “dependency” and select the result!
You’ll then be met with a pop-up asking you which mode you’d like to use for your dependencies. You have three options:
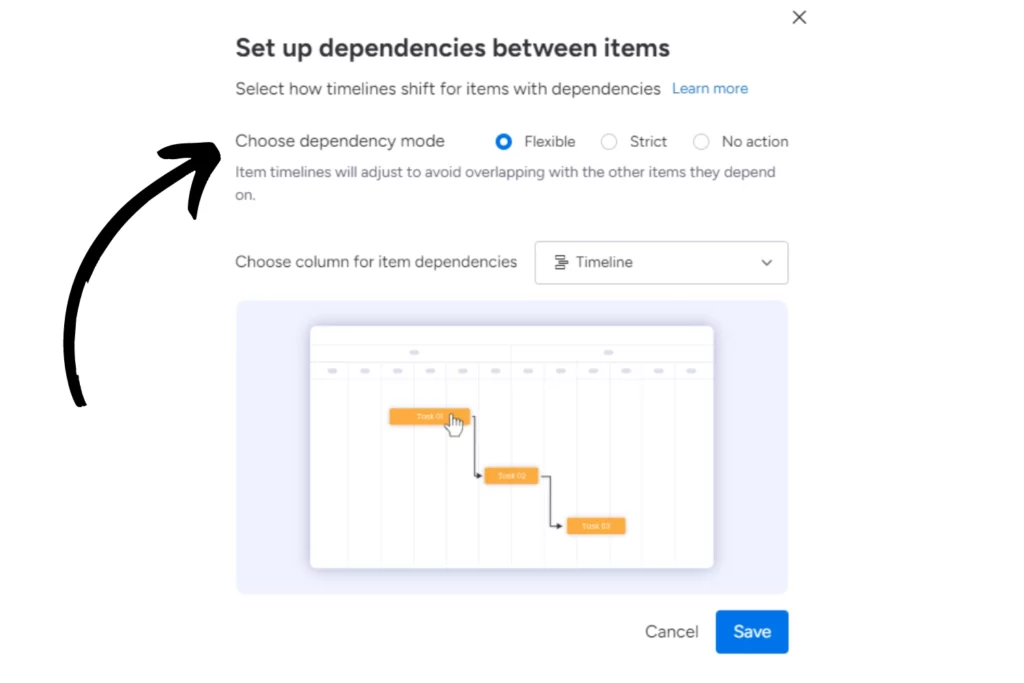
Flexible mode: This allows you to move tasks around without affecting other tasks unless you try to push a parent task past the date of its dependent child task. This option is ideal if your projects can tolerate some changes and you expect occasional adjustments to project dates.
Strict mode: This mode maintains the exact intervals between tasks. If one task is moved, all subsequent tasks that continue a dependency chain shift by the same amount of time. This is perfect for teams that need a consistent timeline for each task and want to ensure uniformity even if one stage of your project is delayed.
No Action mode: As the name suggests, this option means that changing the date of the parent task, even if it extends past its dependent child task’s date, will not automatically adjust the dates of other tasks. This is suitable if you prefer a more relaxed approach while still maintaining task connections.
This can be edited later so don’t stress about it too much! Once you decide which option is best for you, select it and click save.
Creating item dependencies
Now it’s time to start creating dependencies between different items on your board. Simply click on the dependency column for the child item of your choice, and select the parent item you want it to be dependent on.
In this example, I have made the child item ‘Bring in furniture’ dependent on the parent item, ‘Fit kitchen’.
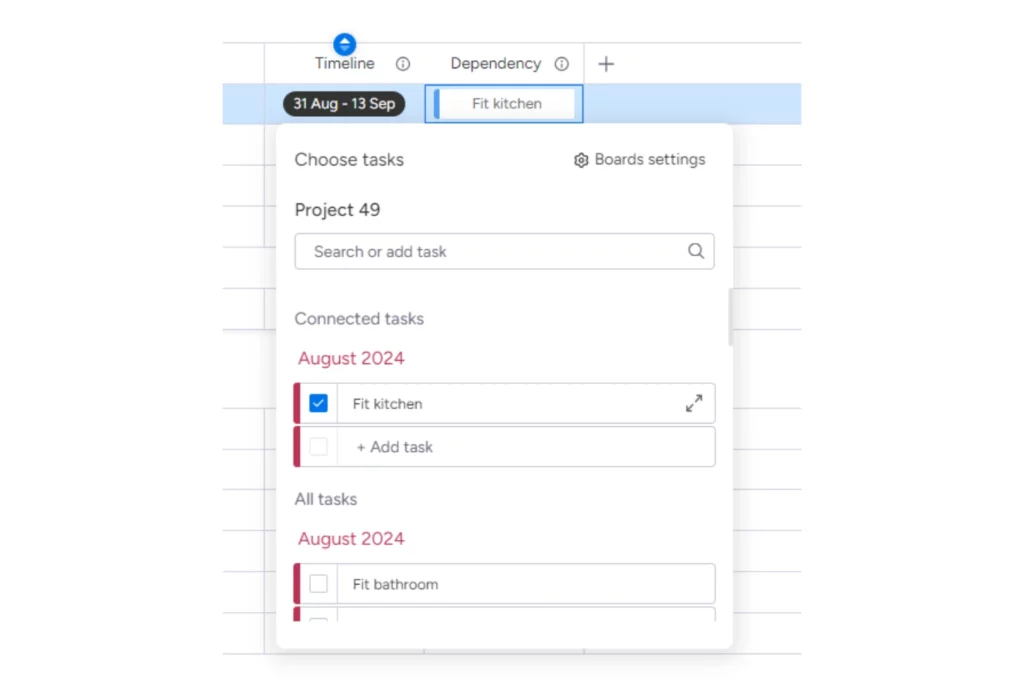
Once you have selected a dependency, head over to your Gantt view.
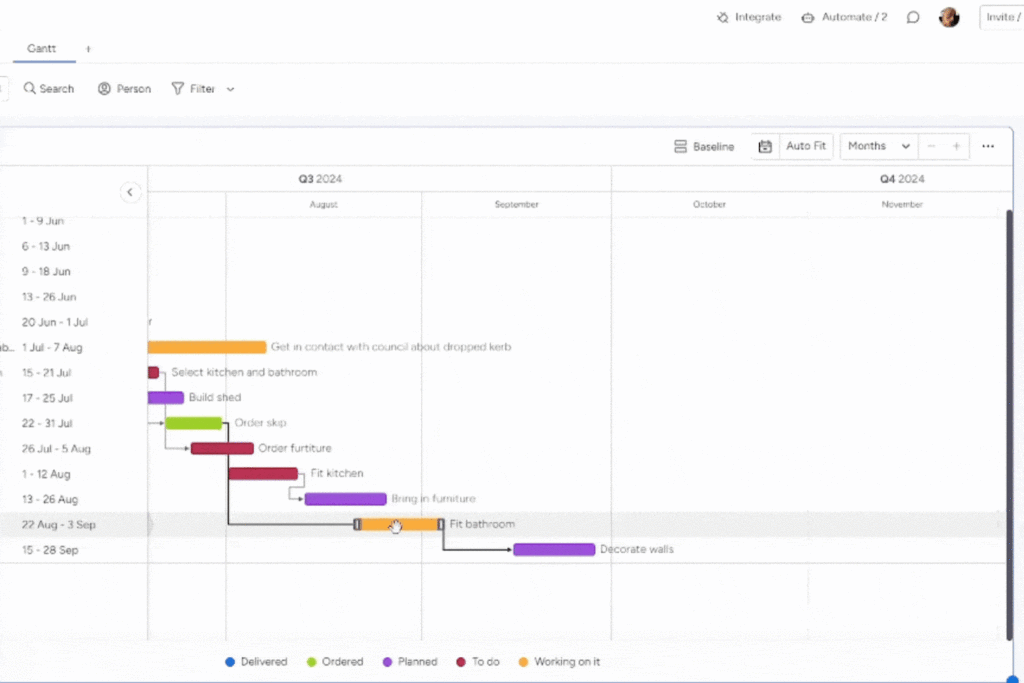
When viewing the chart, locate the item with a dependency, and you’ll notice a line connecting it to the task it depends on. For example, just as we set up on the board earlier, “Bring in furniture” is dependent on “Fit kitchen”, and this relationship is represented by a connecting line on the Gantt chart.
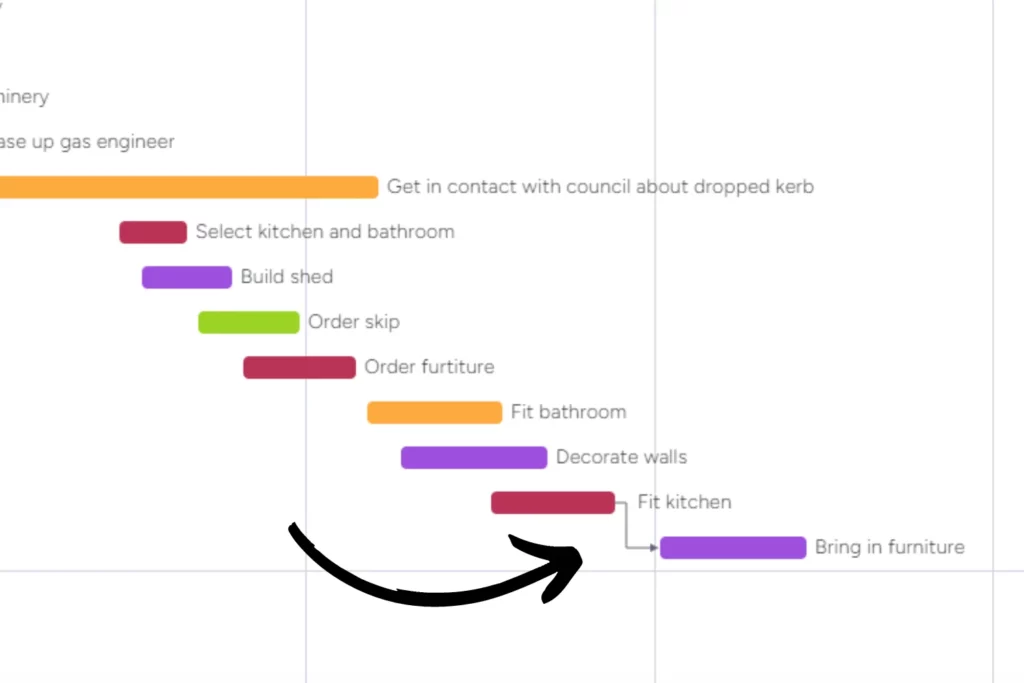
The Gantt chart displays all of the dependencies which are on your board. When a few more dependencies have been added to your board, they are automatically added onto the Gantt view as seen below.
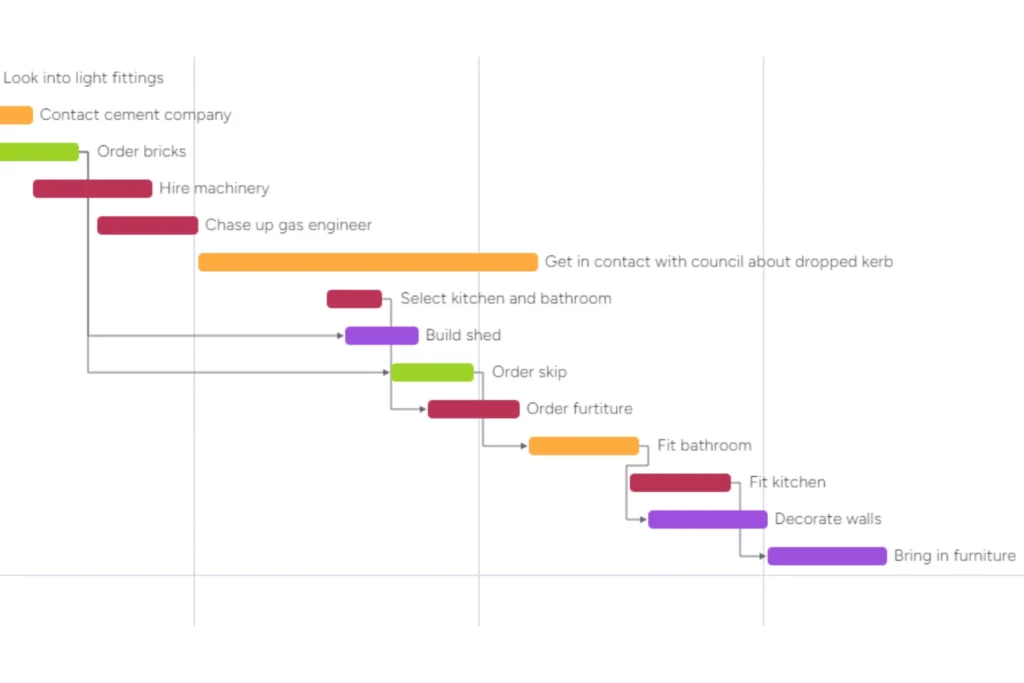
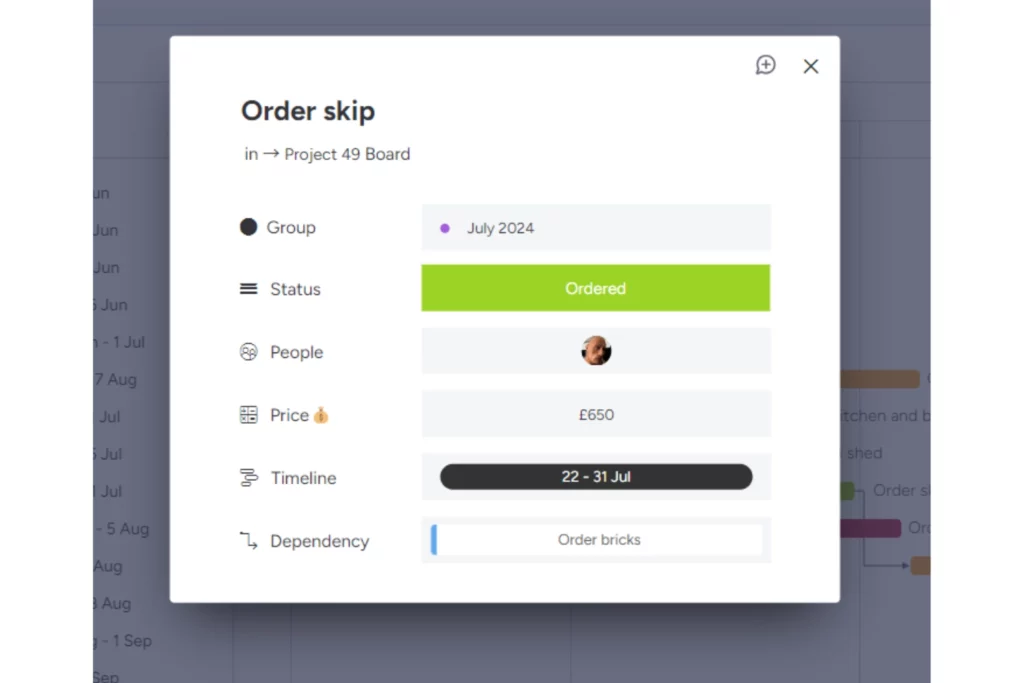
As our Gantt view fills up with dependencies, things might start to look a bit busy, but don’t worry! You can easily drill down into any item by clicking on the coloured line. This will provide all the information you need about a specific task, including its status, dependencies, and specific custom fields such as cost. You can view and update everything from here.
Moving tasks on a Gantt view
This is where the dependency modes come into play.
Currently, our dependency column is in flexible mode. This means when we move tasks with dependencies, the dependent tasks won’t be overtaken but they also won’t maintain a set time period between the tasks.
The task ‘Bring in furniture’ depends on the completion of ‘Fit kitchen’ with about a week in between. But what if fitting the kitchen overruns? To avoid any further delays to the project, we need to shift that task and push back subsequent tasks.
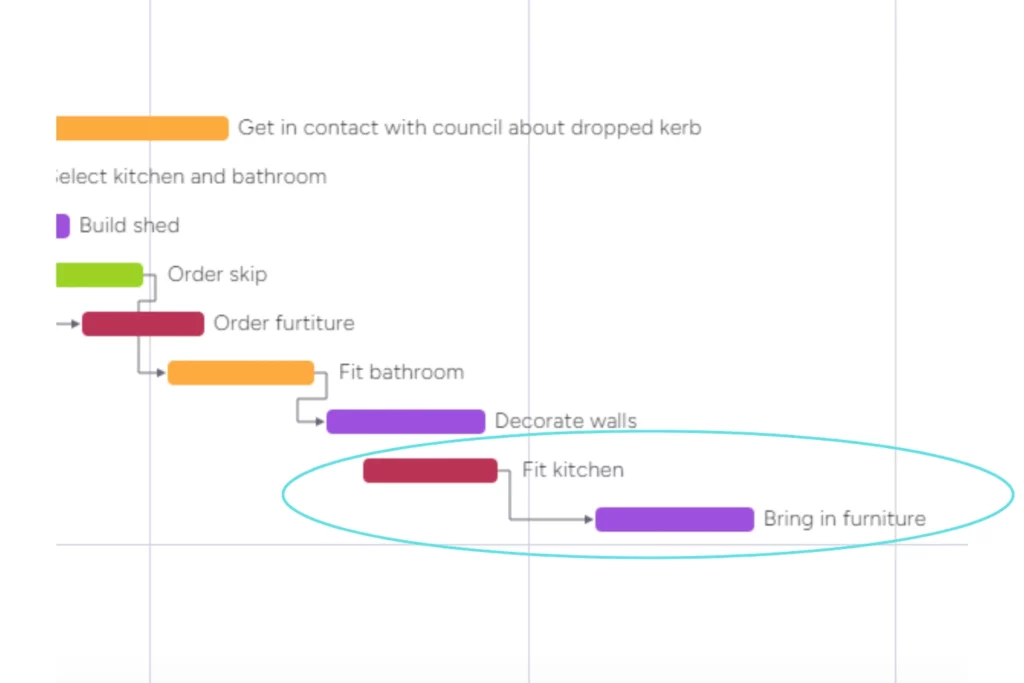
From the graphic below, as the parent task ‘Fit kitchen’ is moved, the ‘Bring in furniture’ child task also shifts forward. While this prevents tasks from overlapping, it reduces the original gap between them.
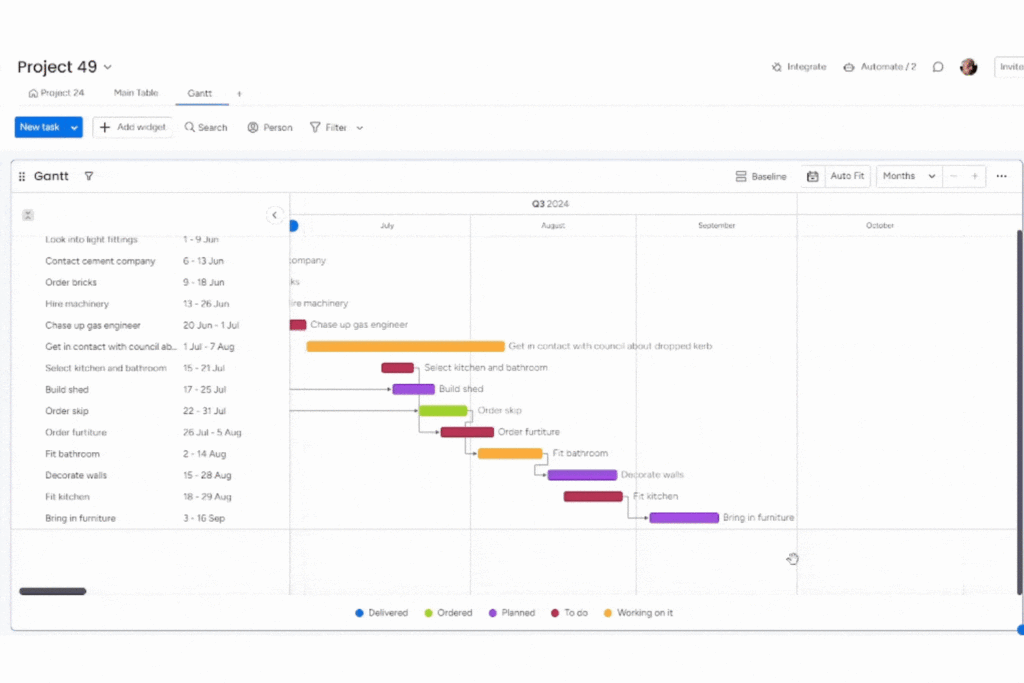
So what’s the solution? Switching the dependency mode of course!
Head back to the main view on the board, and select the three dots next to the ‘dependency’ column header.
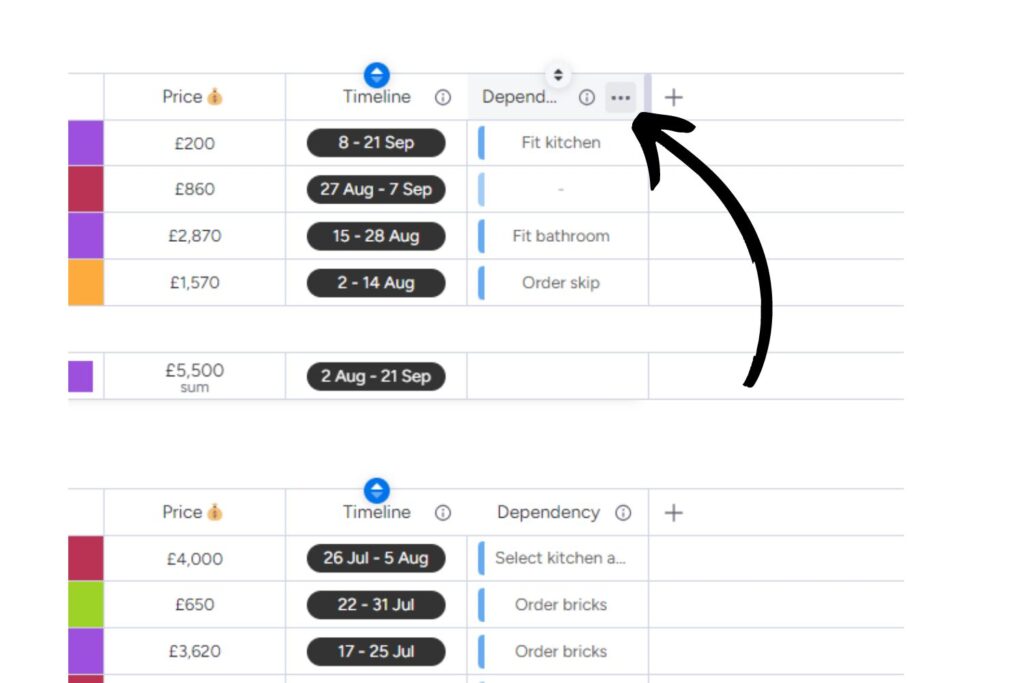
Then head to Settings and ‘Customise Dependency column’.
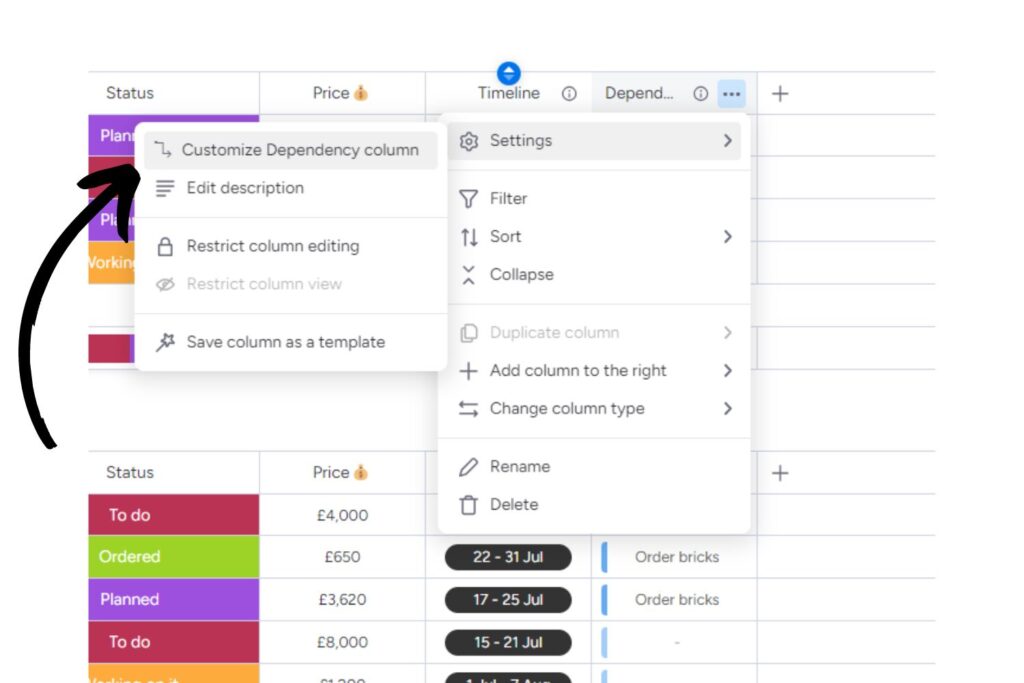
Now you can choose the mode for your dependencies. Currently, we’re in flexible mode, but we want to maintain the set gap between tasks. This way, if one task is delayed, the rest of the project shifts accordingly!
Let’s switch to strict mode and see what happens. Select Strict then hit save!
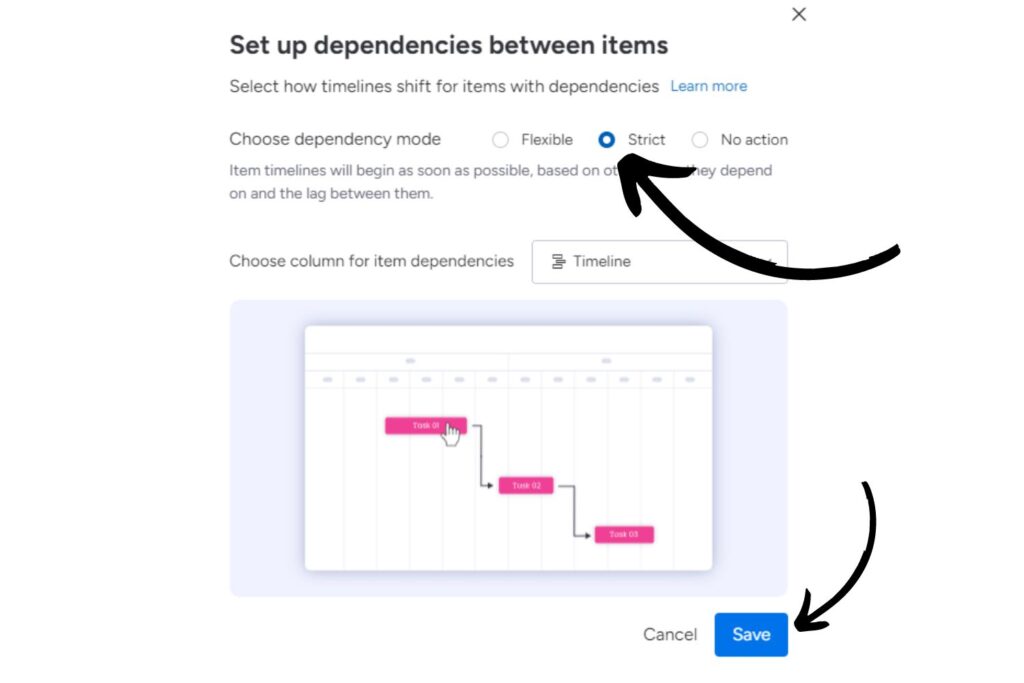
In this updated mode, when you move a task with a dependency, the following tasks move by the same amount. This ensures your projects run much smoother.
Viewing dependencies on a dashboard Gantt view
Dependencies not only appear on the board where they are created, but also on your dashboards! For example, in our projects dashboard below, you can see all the dependencies set up across various boards, giving you a comprehensive view of the collective progress for all your projects.
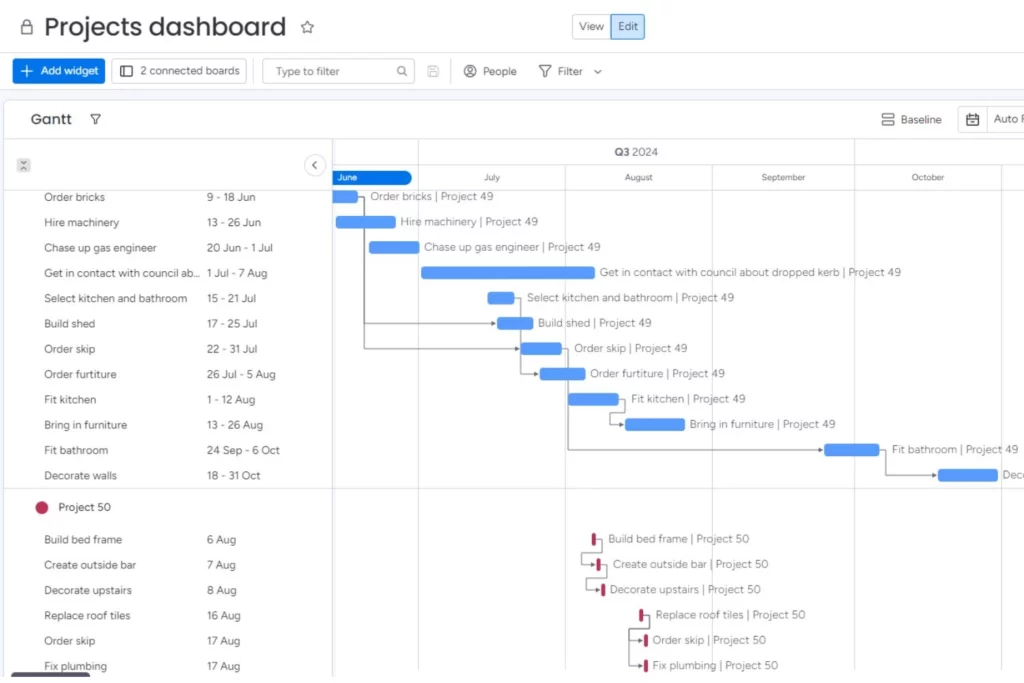
And just like the Gantt view within our boards, you can click on each item to edit it directly from your dashboard.
Thanks for reading our blog on dependencies within monday.com. There is also a video available, explaining how dependencies work in monday.com. Click the image below to watch that video!
If you require further assistance with monday.com, click this link and fill out the form.

