How to connect boards and use mirror columns in monday.com
If you have used monday.com for an extended length of time, there’s a strong chance that you’ve come across this problem: you have multiple boards, and you need information from each of them to do your work. And if you’re anything like us, working by navigating multiple tabs simultaneously is the worst way to work efficiently.
Thankfully, monday.com has a solution that means you can banish those extra tabs forever.
It comes in the form of the Connect Column and the Mirror Column. These two features combine to connect multiple boards together, and then display information that’s stored in the board that you’re not actively looking at.
And the best part is that you only need to set it up once, and adding more boards to a connection only takes a few clicks.
What are the Connect and Mirror Columns in monday.com?
The Connect Column in monday.com does what the name suggests. It adds a column to your board that will establish a connection to another board in the same workspace. After the connection is made, a line item from the board or boards that you connected to the column can be added here.
Let’s say you have two boards, Board A and Board B. So that you can see information from your line items on Board B in Board A, you need a Connect column to establish this connection.
Once done, line items in Board A are connectable to items from Board B, and those items from the latter can be entered into the Connect Column.
But the connect column itself doesn’t display the information. The connect column is there to establish the connection between boards.
This is where Mirror columns work their magic.
Add Mirror columns after adding a Connect column and you’ll bring through data from the board that you have connected, displaying the data of the column that you wish to see.
Using the above example, the information exists in Board B, but you are mirroring this information into Board A. It will display in the Mirror column, and will update in the Mirror if it is changed in Board B.
How to connect Boards in monday.com
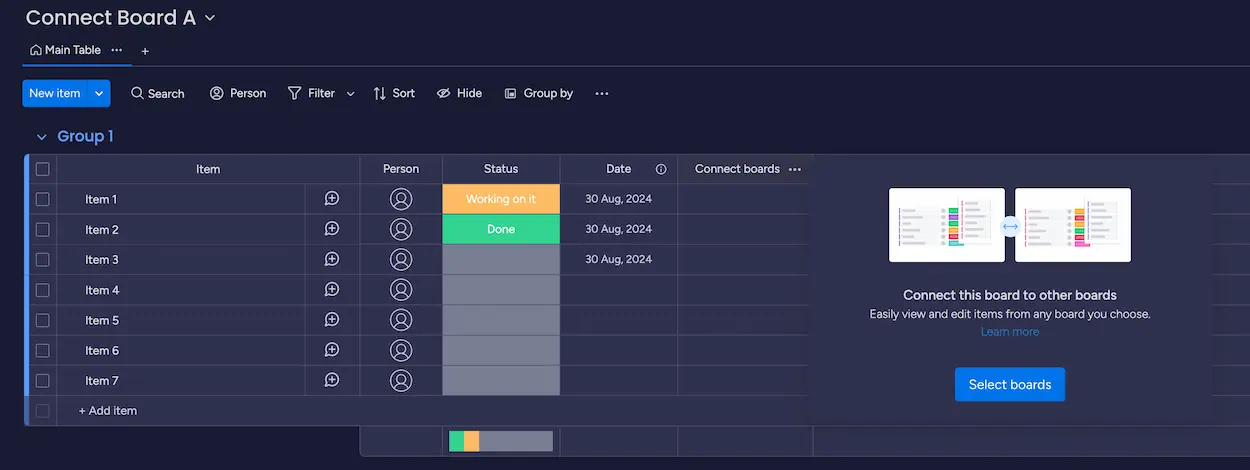
To add a connection to another board, create a column and add the Connect Board column in the board that you want to mirror your information to (which in our example would be Board A).
A prompt will appear asking you to select a board to connect to.
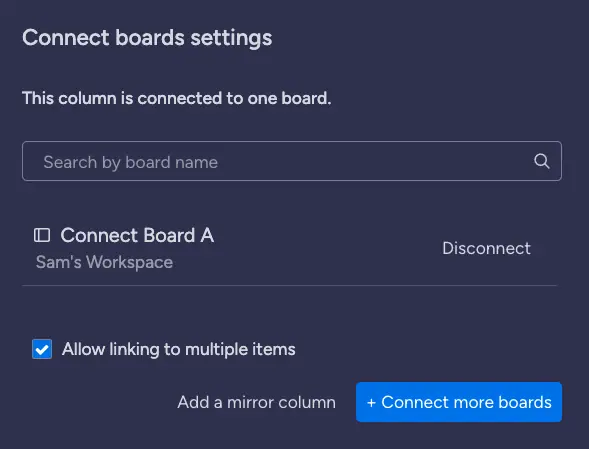
Hit ‘Select boards’, and then you will be asked which boards you want to connect to this column. You can add more than one board, so if there is a benefit to adding more than one into here, then select them here. You can add more boards if you want to include others at a later time, which we’ll cover shortly.
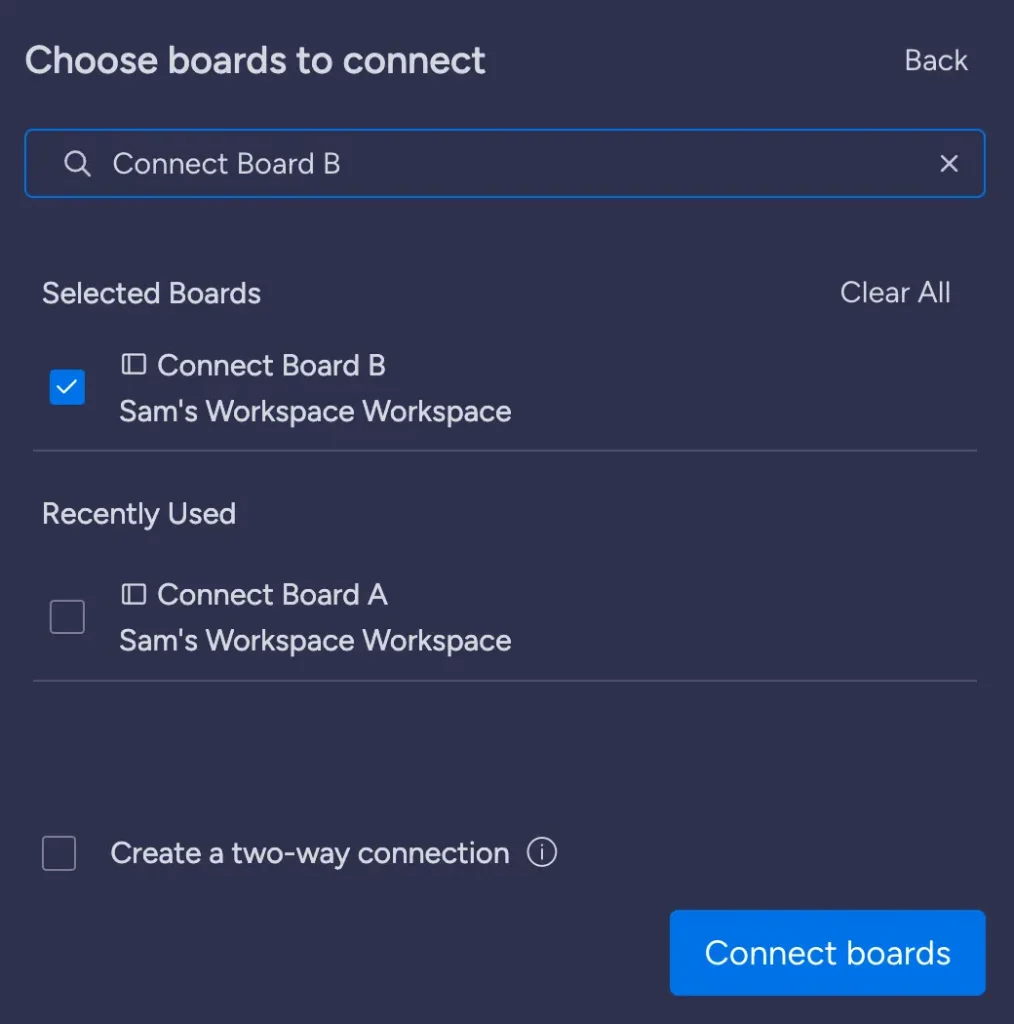
There is also an option to create a two-way connection. Checking this will create a Connect column in the board that you are connecting to. This is great if you want to feed information from between both boards, useful for instances like when relating deals to contacts in a Sales CRM pipeline.
Note that the two-way connection can only be established at this point. You would need to recreate the connection if you anticipate adding more boards in future.
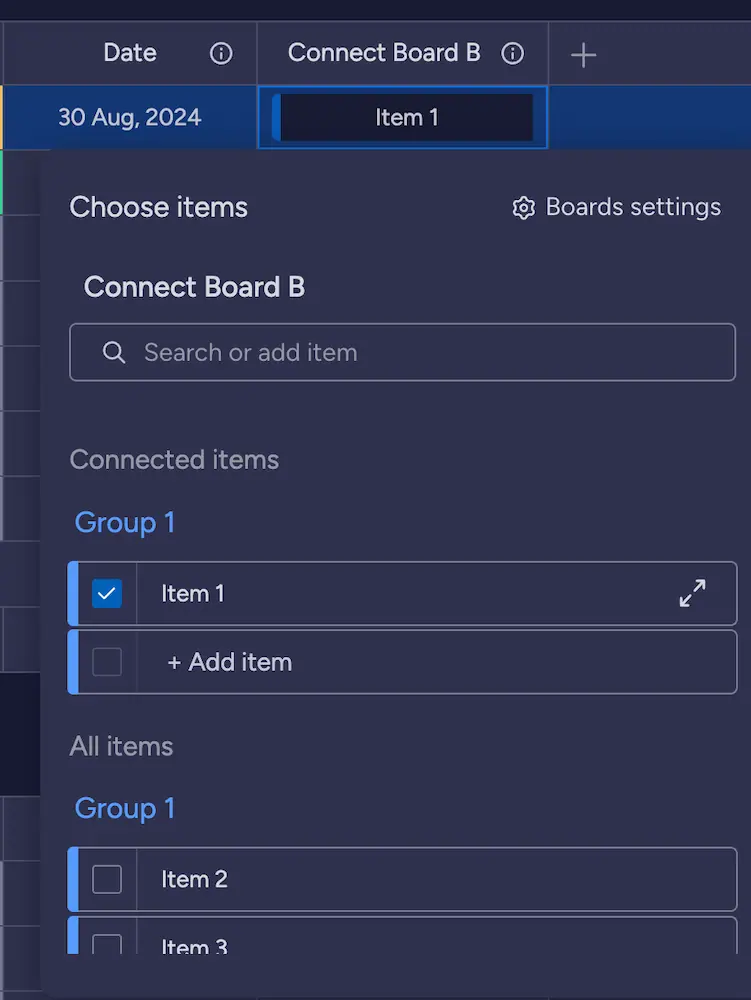
Once done, click Connect Boards and you’re done! Now when clicking on the column in a board item, it will ask you to pick which board you want an item from, and then pick the items that you want to connect.
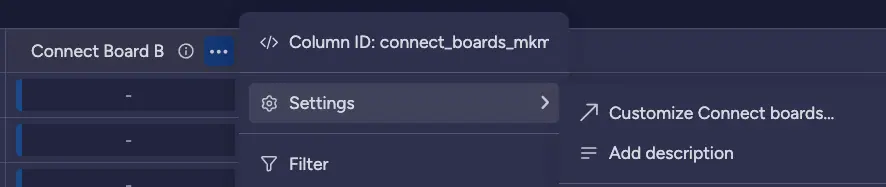
If you want to add more boards to this column later on, click the three dots when hovering at the top of the column, go to ‘Settings’, and then ‘Customise Connect Boards’. At the bottom is a button to add more boards into the mix.
How to use mirrors in monday.com
Now that you’ve connected your boards, let’s start mirroring some data through. After creating the Connection, monday.com will prompt you to create a mirror column, but you can also add them the usual way at the end of your board and clicking the plus icon.
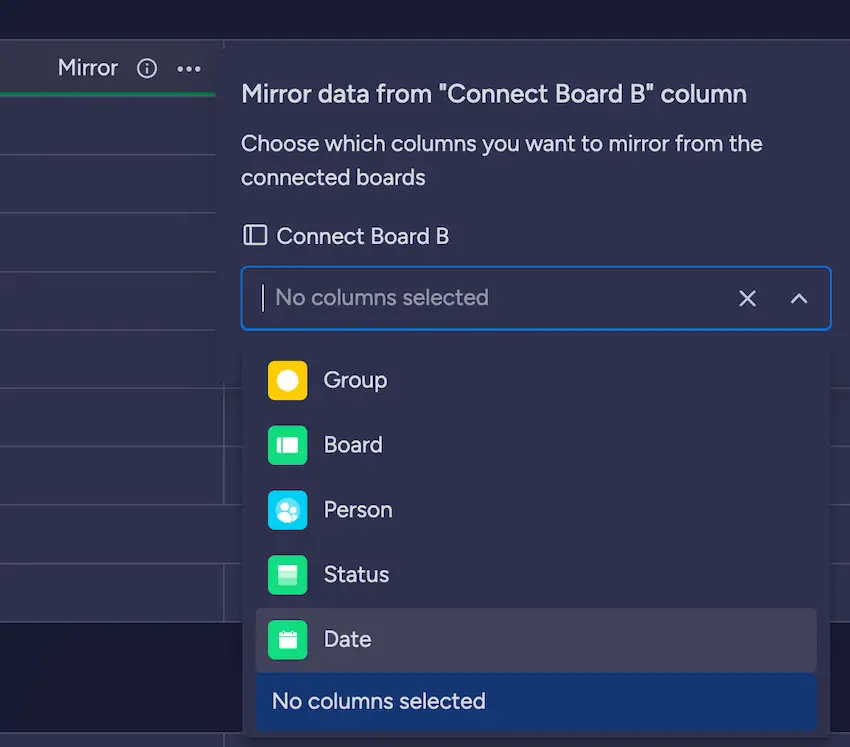
Upon adding a Mirror column, you’ll be prompted to Connect it. If you don’t see this, then head to the three dots at the top of the column, ‘Settings’ and then ‘Customise Mirror column’.
This is where you’ll need to confirm which Connect column to use. You can add more than one connect column to a board, so this will make sure that you are mirroring data from the right place.
In our example, it will connect to Board B, and you can choose which column to mirror through.

After adding an item to the Connect column, the data from that item in Board B will now mirror the column data through. You can add as many mirror columns as you want, and you can rename both the Connect and the Mirror columns for organisation.
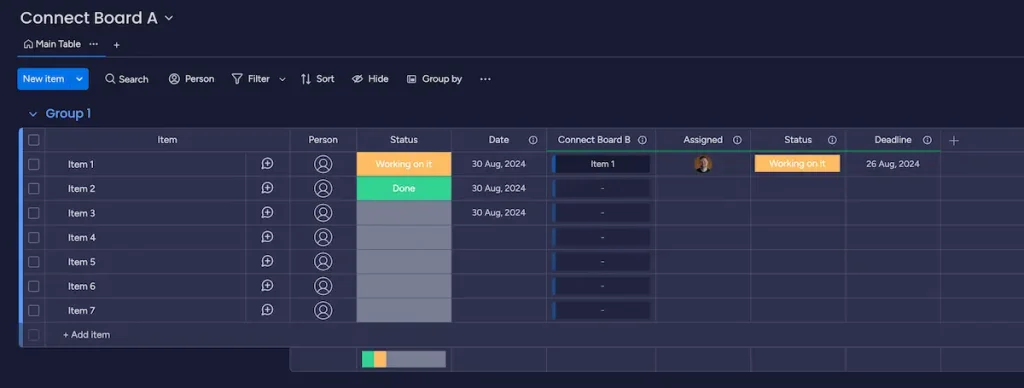
The colour underneath the column header indicates which mirrors correspond with which Connect column. If you use multiple Connect columns, this colour will help to identify where the connections are. As shown below, one set of mirrors link to the first Connect column for ‘Connect Board B’ have a Green underline, while the other set link to the ‘Leads Board’ Connect column are underlined in yellow.

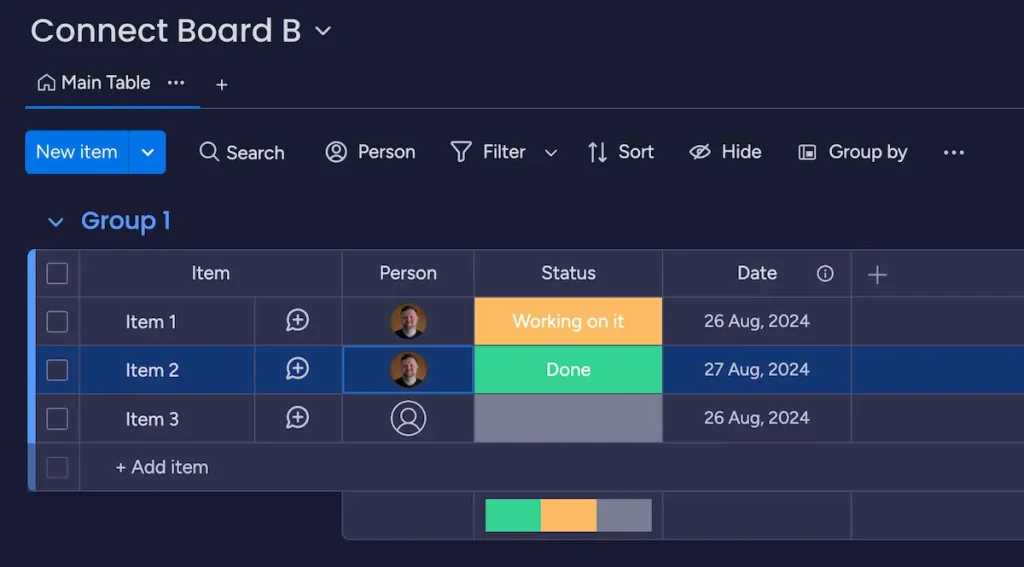
Finally, if you change information in a Mirror column, it will reflect the change in the original board that the information is located in.
So with the above image, after changing the Status mirrored column from ‘Working on it’ to ‘Done’, the item’s status in Board B will now be set to Done.
Conclusion
We hope that this helps you to connect more of your boards together for a smoother workflow in monday.com. We have covered the basics to get you started with connecting boards and adding mirrors, but their functionality goes much deeper than what we have shown in the blog. They are an extremely powerful tool!
After establishing your connections, you can share your boards with colleagues and others that will benefit from the data that they display. For more on sharing boards, check out our blog on board sharing.
If you have more complex structures that you need a partner to help build your vision, look no further!
enable has helped hundreds of businesses every year to improve their efficiency and experience with monday.com with out professional services. You can book a meeting with our consultants here.