How to use DocuGen in monday.com

Creating multiple invoices from scratch everyday is tedious. Inputting the correct figures, names, and addresses manually soon becomes a time-consuming and repetitive task for admin and account teams. But what if there was a way to automatically generate the documents you need with just a click of a button?
DocuGen is the go-to monday.com app for creating documents from templates and generating personalised documentation based on the information within your boards. With features like template uploads, document previews and automated sending, DocuGen transforms your day-to-day operations by saving countless hours of manual input.
How to set-up DocuGen in monday.com
The initial setup for DocuGen in monday.com may take some time, but it’s completely worth it. Simply follow this step-by-step guide to integrate DocuGen into your monday.com system.
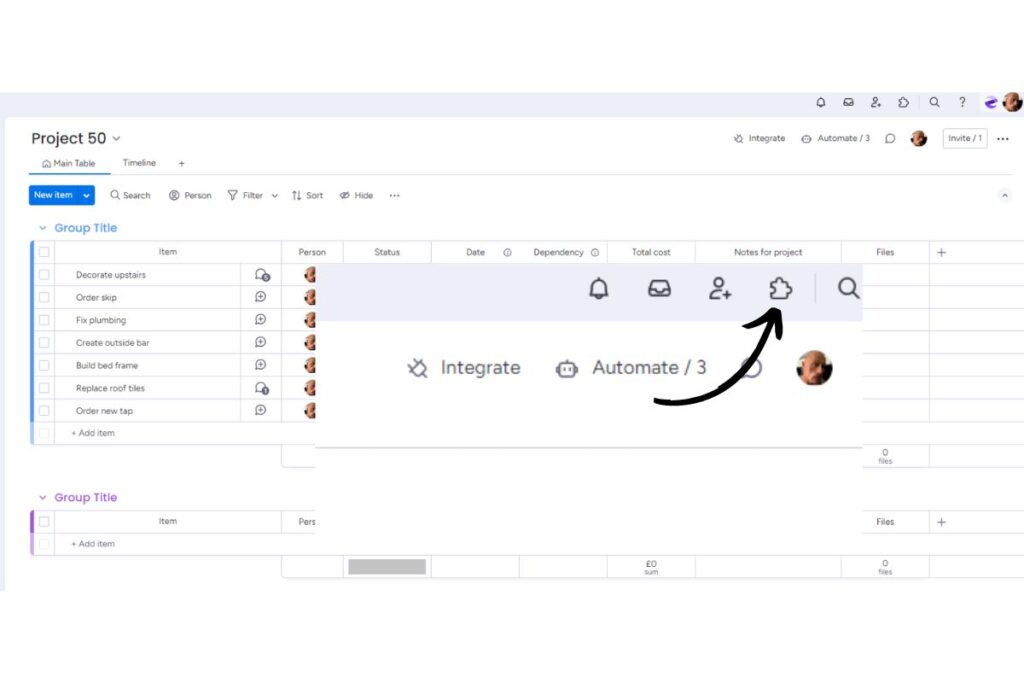
1. Install DocuGen
First, if you don’t already have DocuGen installed, head over to the app marketplace. You can find this at the top of your board, represented by a puzzle icon.
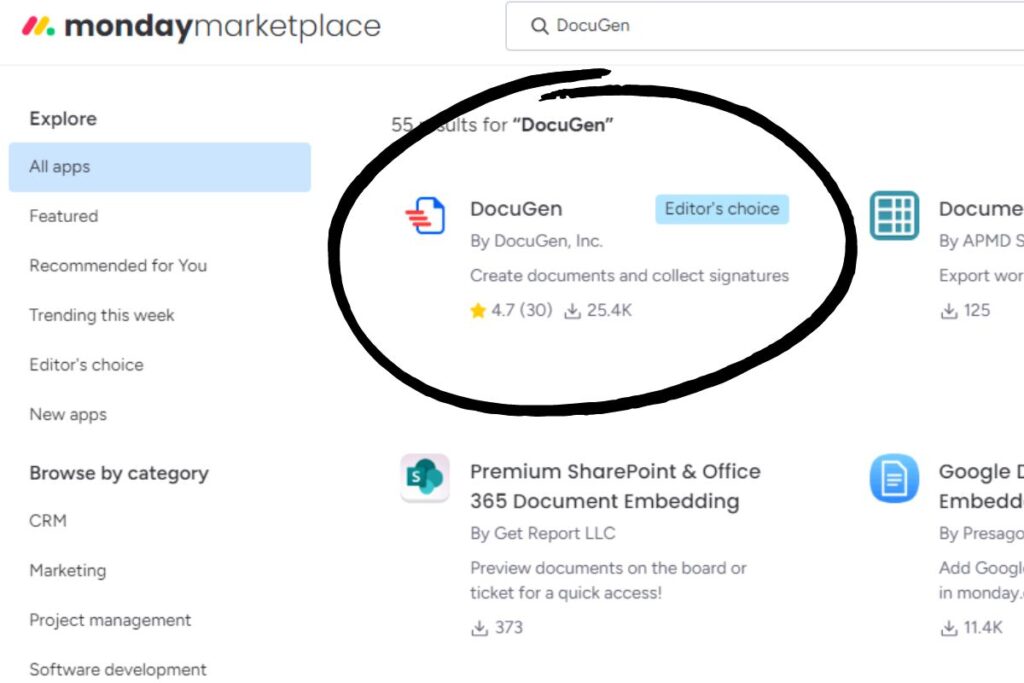
Type “DocuGen” into the search bar, and select the result shown below.
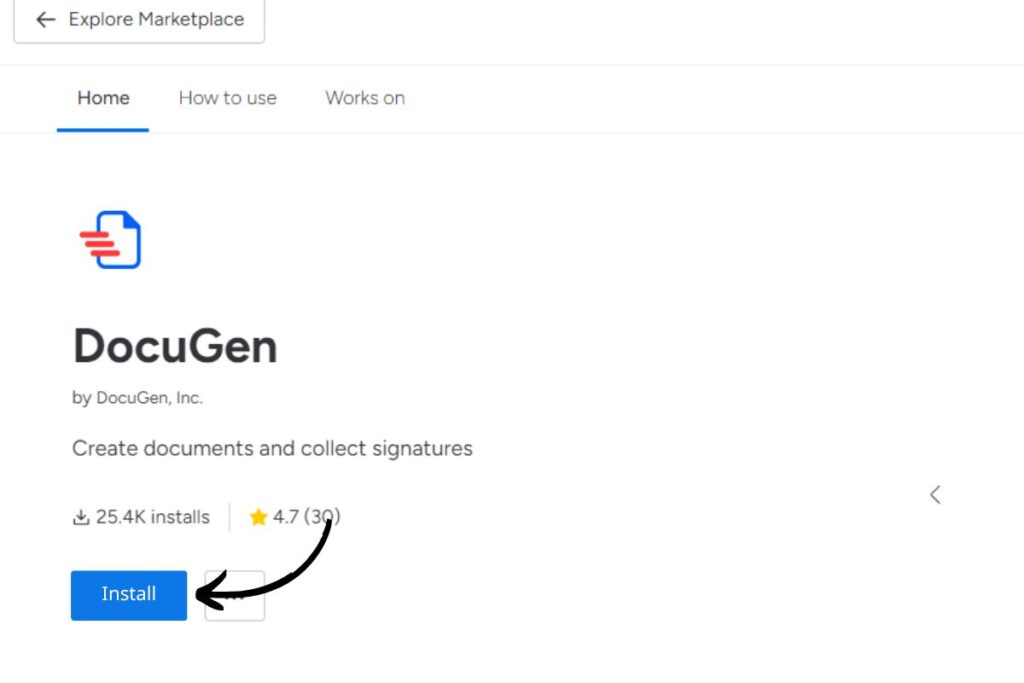
Once selected, the next step is to click the “install” button. This will add the DocuGen app onto your monday.com account, ready for use.
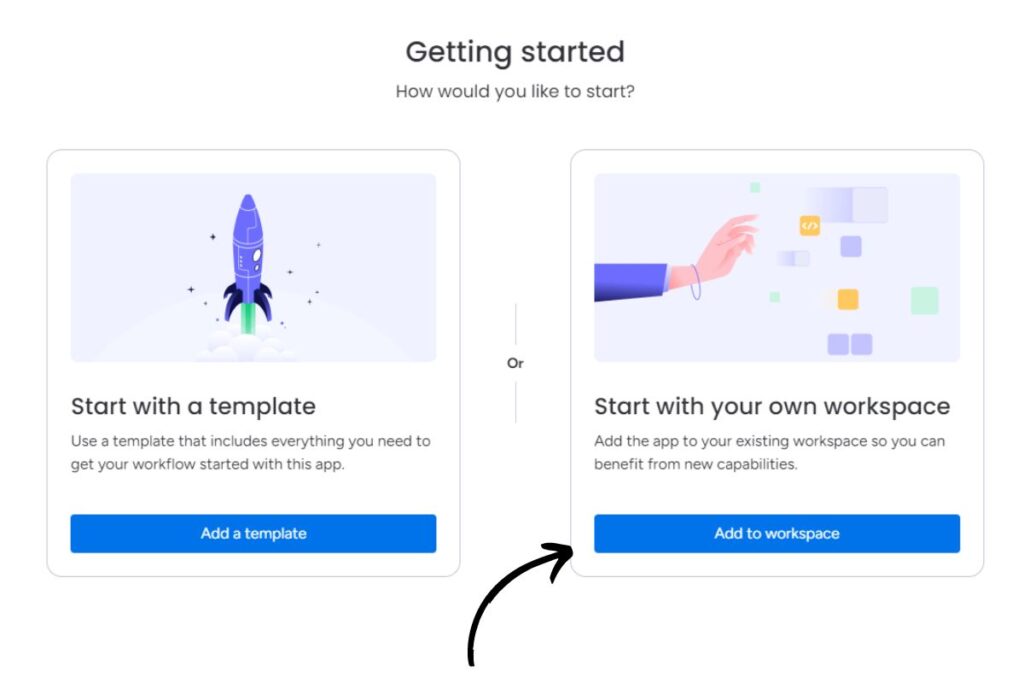
2. Add DocuGen to your workspace
Once installed, you’ll have two options to choose from. You can either start using DocuGen with a template workspace to familiarise yourself with the app’s capabilities, or you can begin using DocuGen within your own workspace. For this example, we’ll be using it in our own workspace.
You then need to choose which workspace and board DocuGen should be added to.

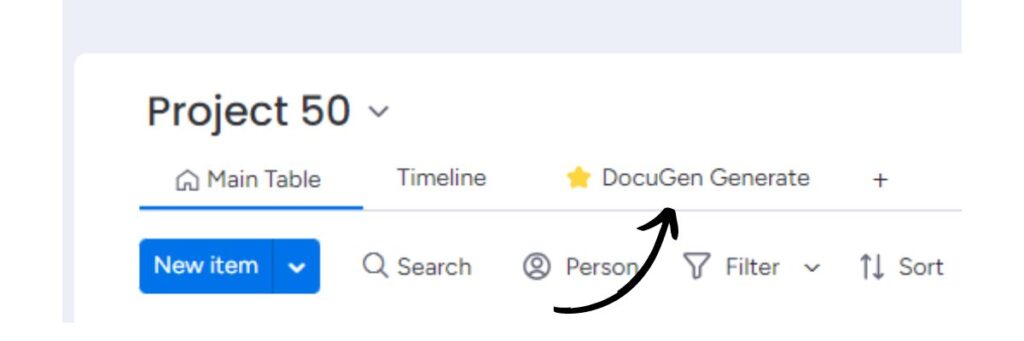
Now that the app has been added to your chosen workspace and board, you’ll see the DocuGen tab along the view bar when you open the selected board.
3. Personalise your DocuGen settings
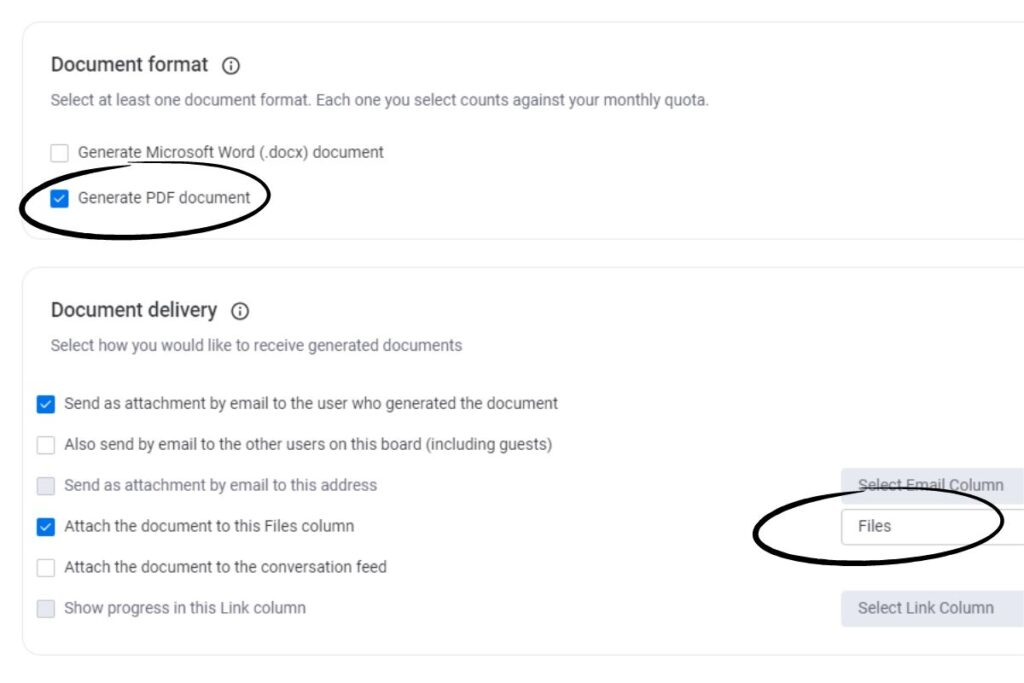
Once the DocuGen view is open, you can customise settings such as the document format and where the generated documents should appear. In this case, the document will be produced in PDF format, sent as an email attachment to the user who generated it, and also appear in the “files” column on our board.
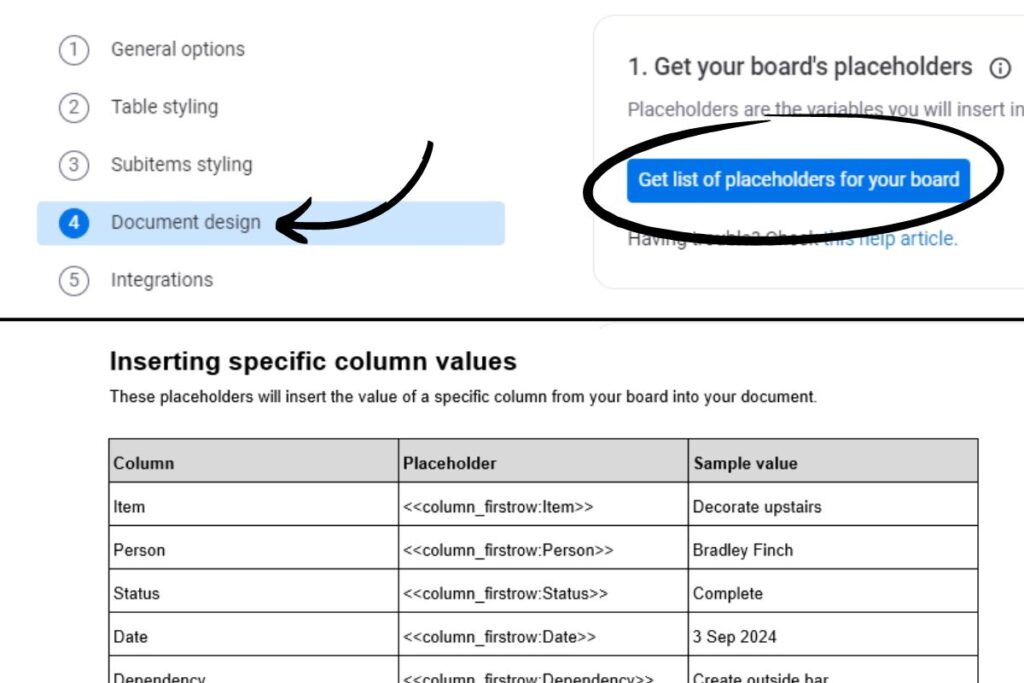
Once you’ve chosen the document format and where they should be generated, navigate to “4 Document design.” This is where the personalisation begins. Click on “Get list of placeholders for your board,” and you’ll receive an email with a Word document containing placeholders specific to your board.
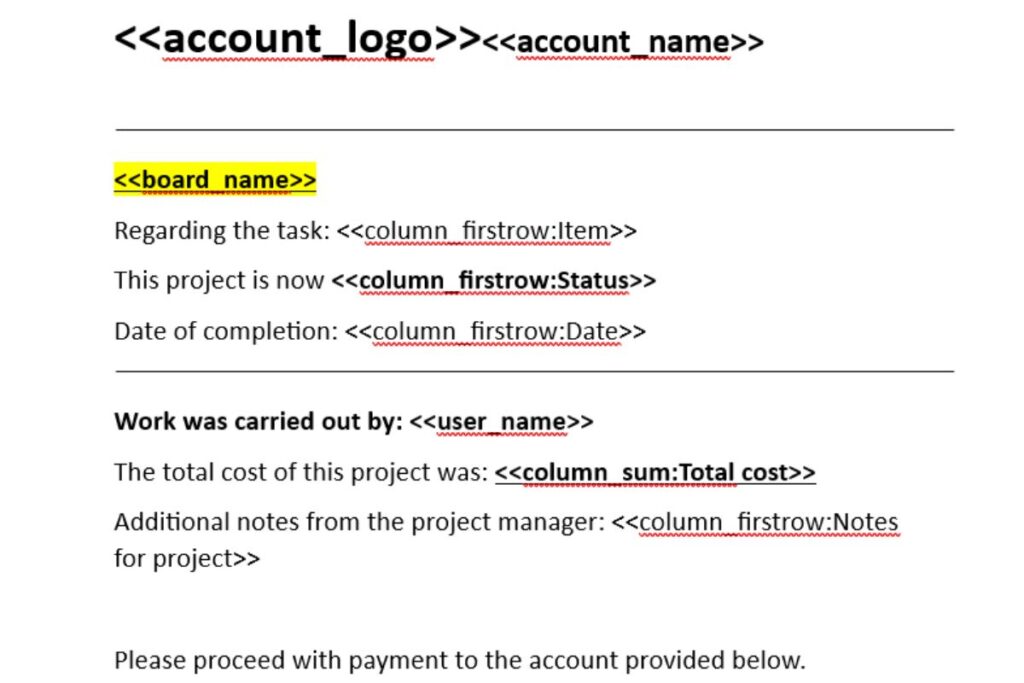
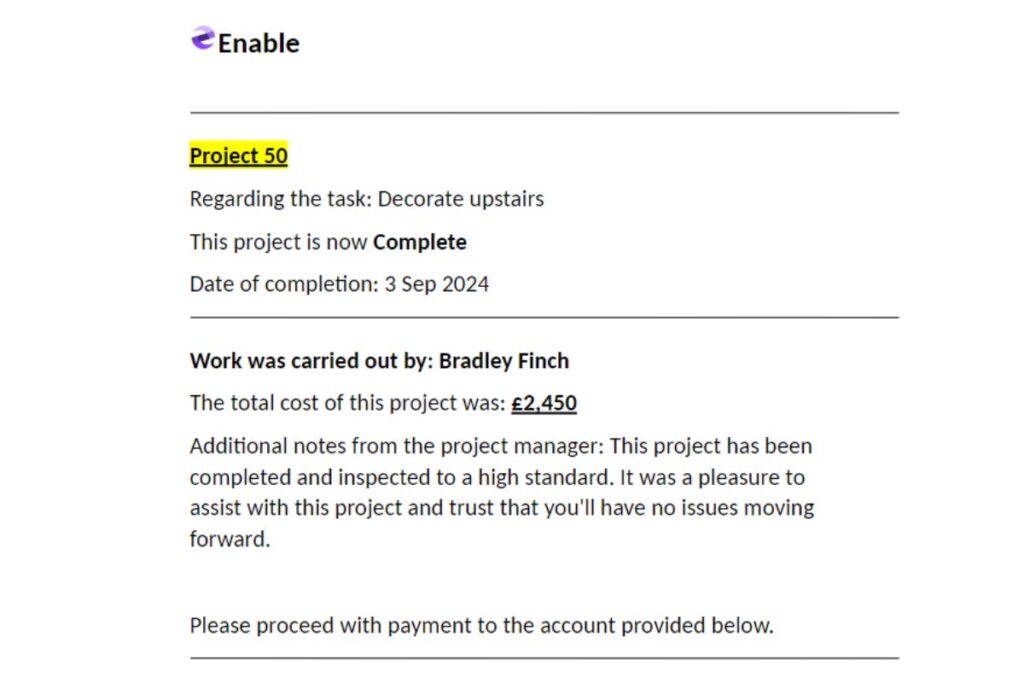
You can use these placeholders to create a customised template for document generation. The screenshot below shows a simple automated task completion document, including details like the task name, project status (confirming it’s complete), final cost, and more. You can add any information you need, as long as it’s available to be pulled from your board.
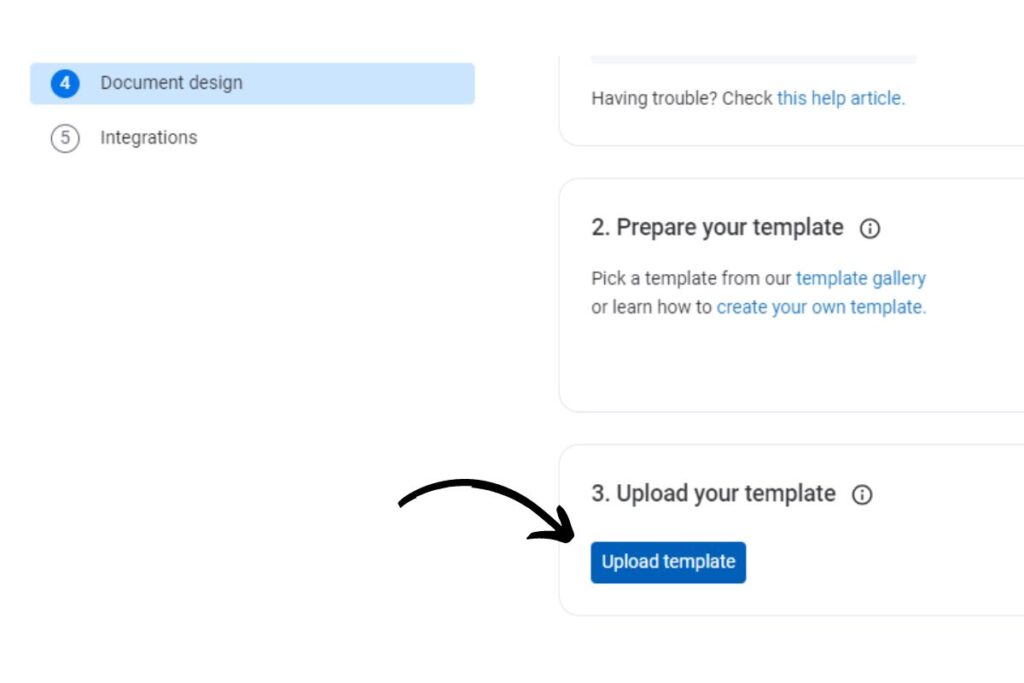
Once your template draft is complete, upload it within the document design section. This will set the board to use that template for generating your documents. Don’t worry if you make a mistake, the template can be re-uploaded as many times as you need.
4. Set up automations for DocuGen
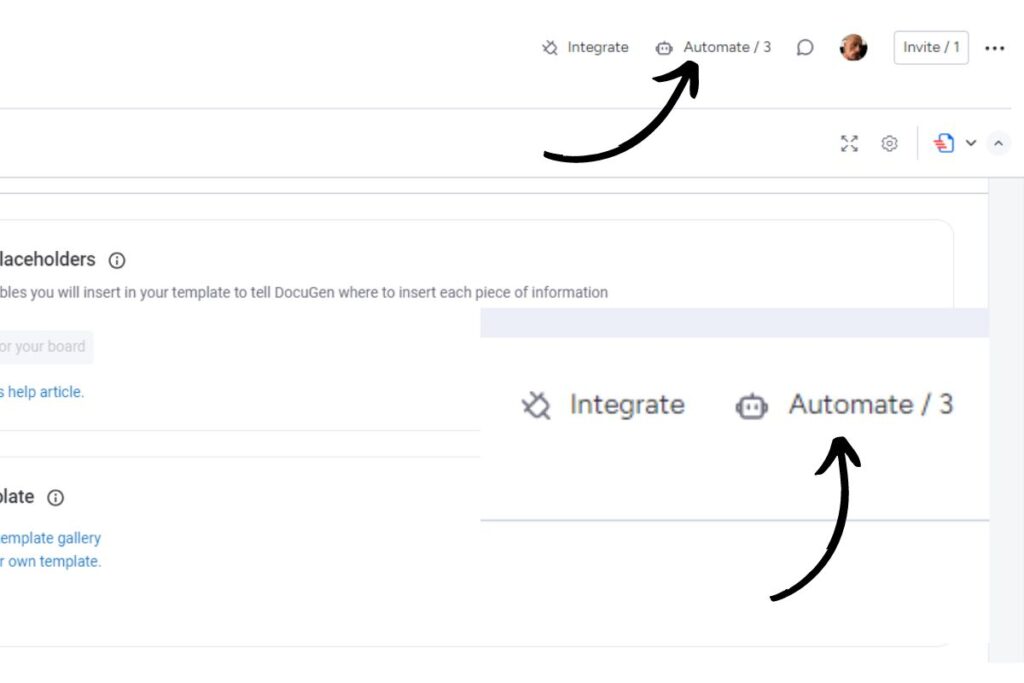
Now we have our generation settings and template complete, it’s time to create some time-saving automations. At the top of your monday.com account is an “Automate” button coupled with a robot icon. If you’re just getting started with automations, read our automations blog for a more in-depth guide.
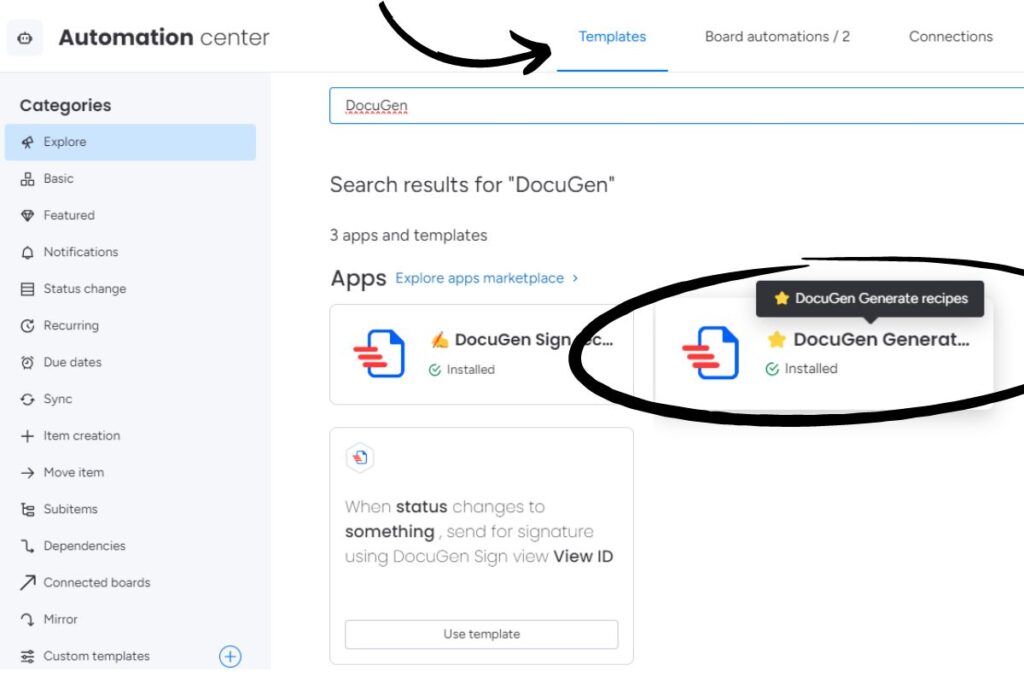
This is the automation centre within monday.com. Here, you can create automations to make day-to-day working as streamlined as possible. Navigate to the search bar and type in “DocuGen”. There will be a few results, but for this example we are going with “DocuGen generate recipes”.
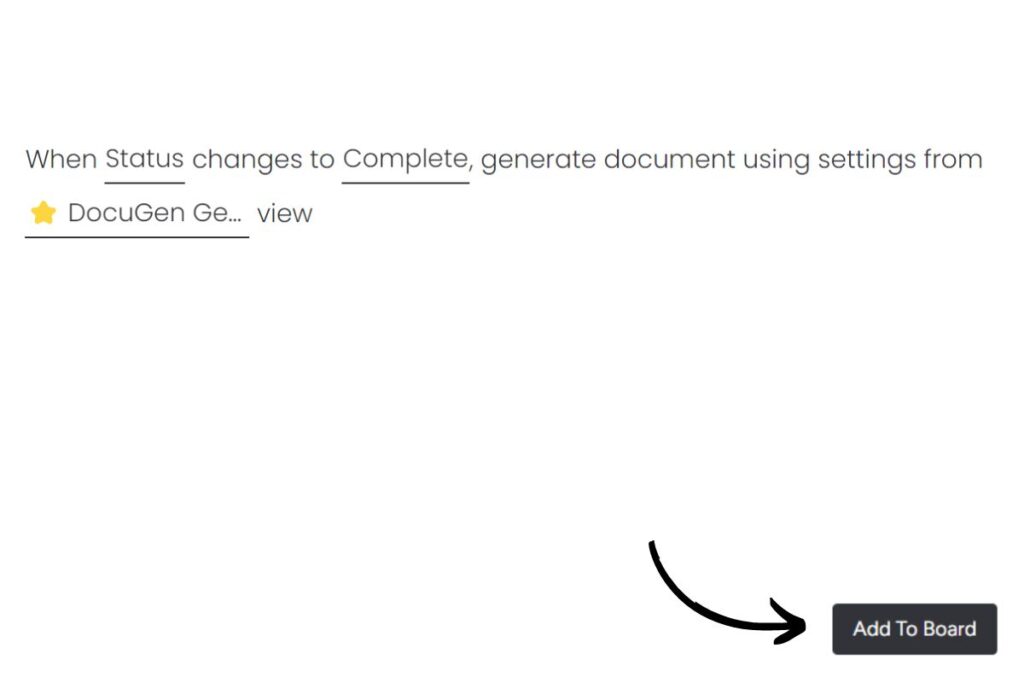
Choose the automation you want to add to your board. You can generate a document when a specific date arrives, when a button is clicked, or, as selected in this case, when the status of an item changes.
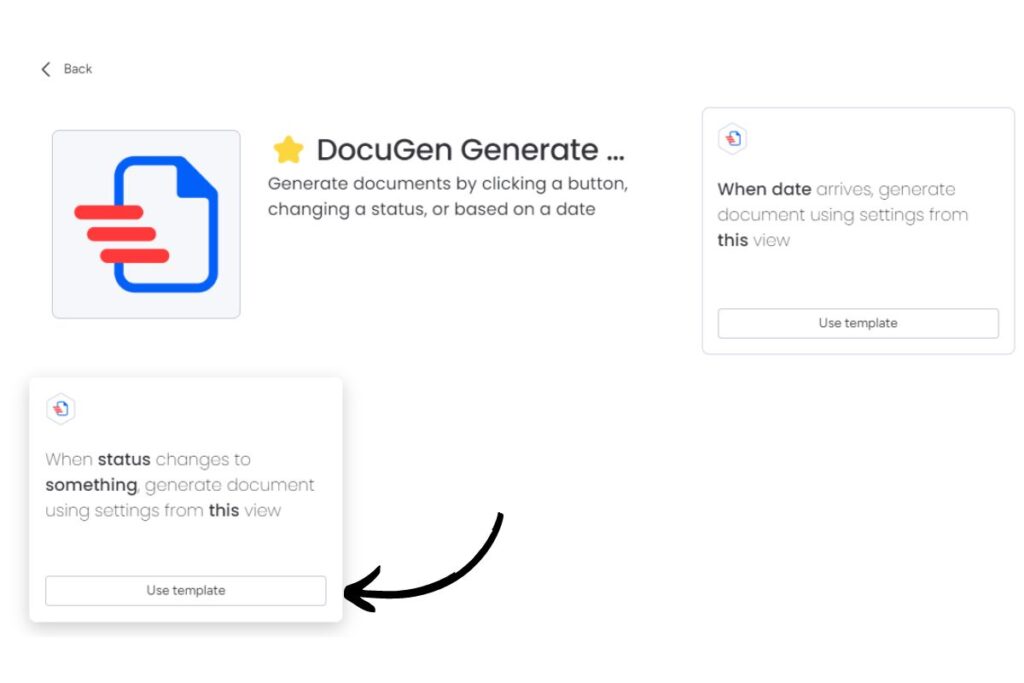
After clicking “Use template,” you’ll need to specify which status should trigger the automation. For example, you could set it to send out a quote when the status changes to “Quoted,” or send an invoice when the item or project is marked as “Complete”. Don’t forget to click “Add to board” to save your automation!
5. Let DocuGen work its magic!
And that’s it! Head back to your main board view and watch as DocuGen works its automation magic. Document generation has never been smoother or simpler, with automatic creation triggered by something as simple as a status change in monday.com.
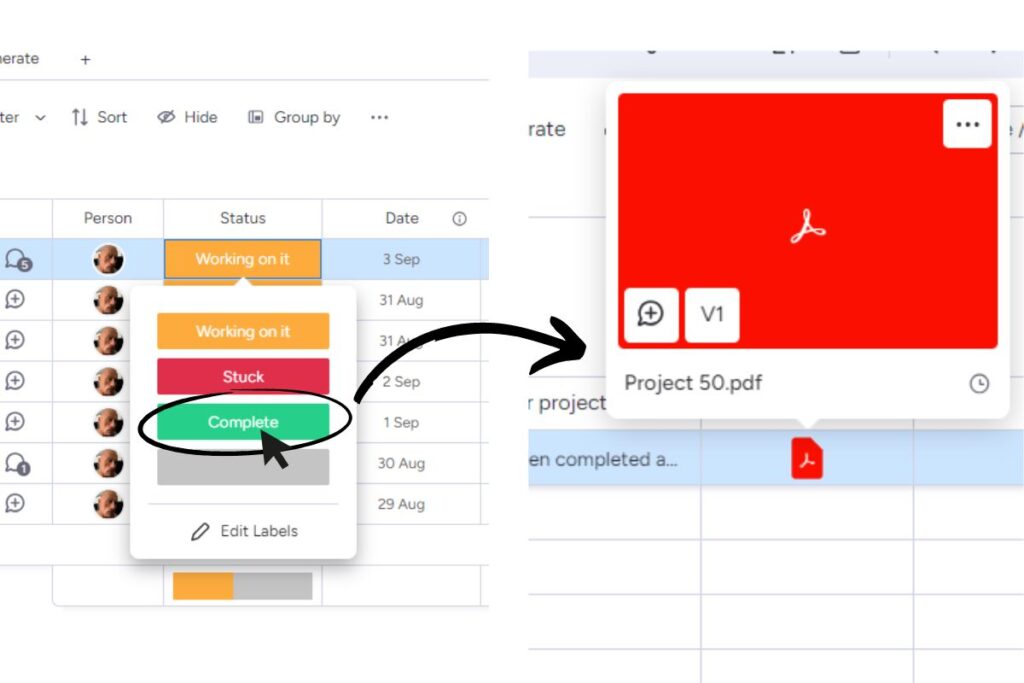
The file has now been generated. Upon opening it, you’ll see that all the information from our board has been seamlessly integrated into the placeholder values we set earlier.
Now that the DocuGen template and automation are set up, every time a status changes to “Complete” on an item, a document will be automatically generated and ready to send to the customer with no manual effort required. It’s that simple!
If you or your team requires assistance with integrating and setting up DocuGen in your monday.com system, reach out to us by clicking this link.